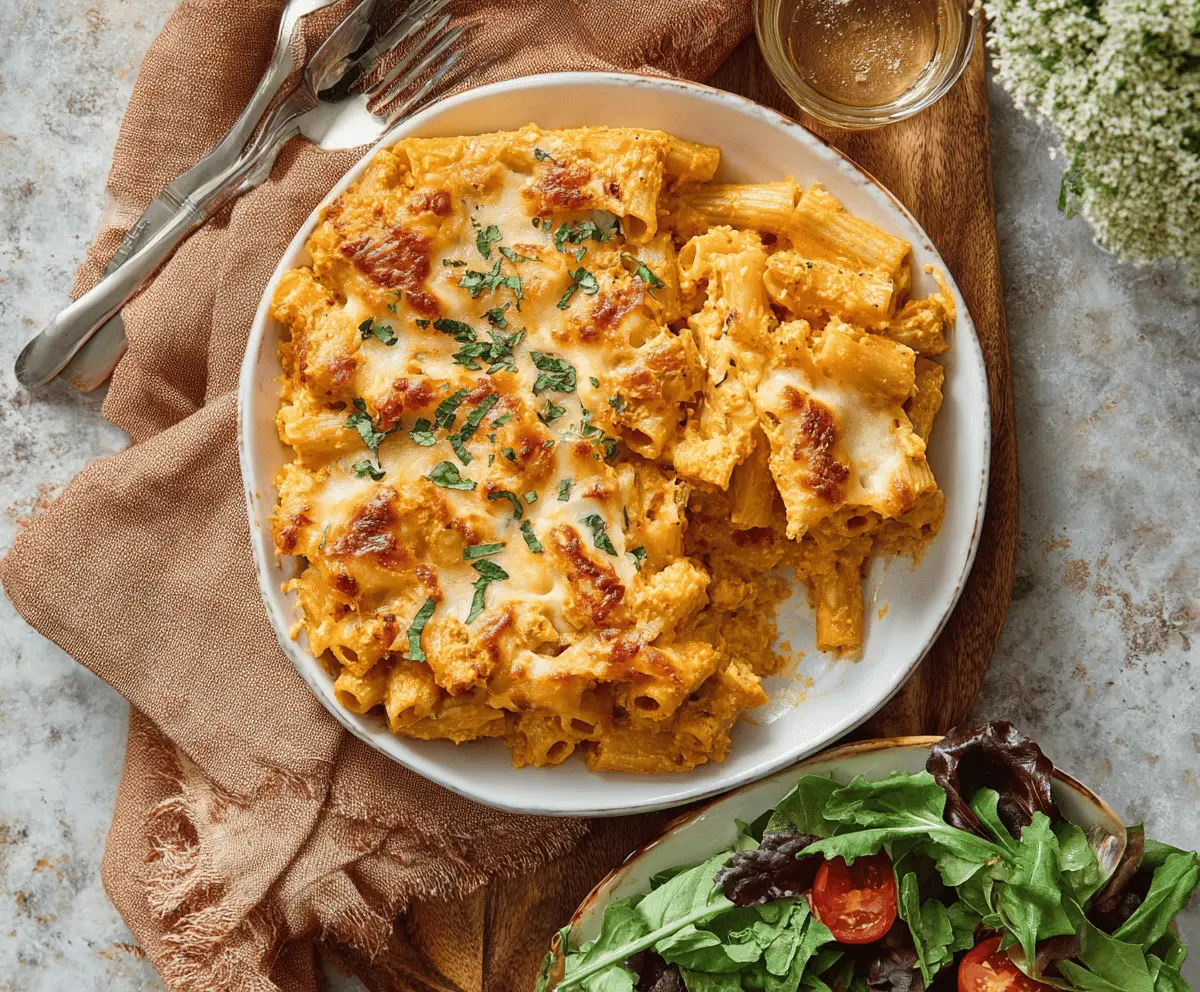
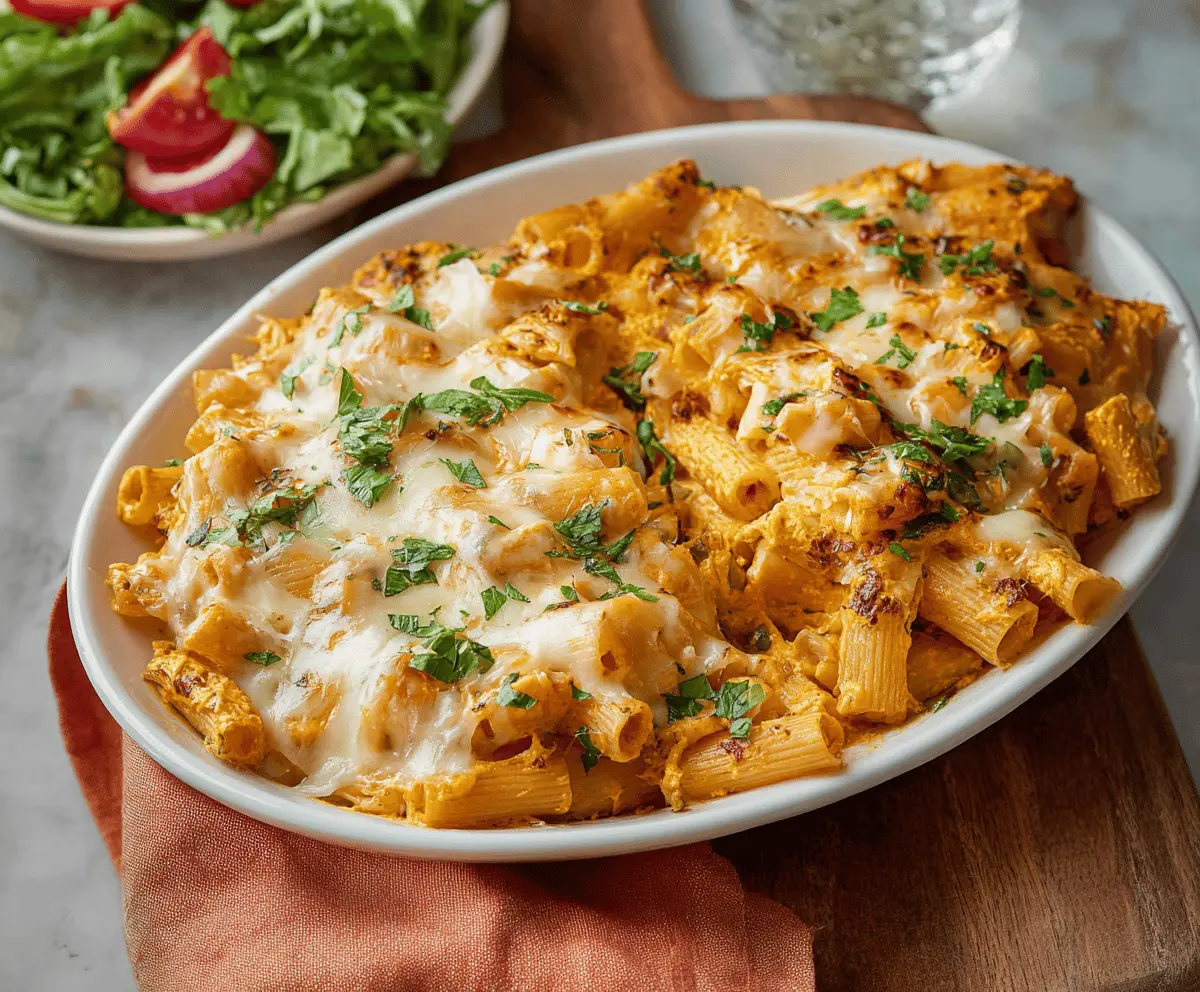
This Cheesy Pumpkin Ricotta Pasta Bake is a warm and cozy dish perfect for fall! With creamy ricotta, savory pumpkin, and loads of cheese, it’s comfort food at its best.
Honestly, who doesn’t love cheese? This bake is so cheesy that you might want to bring a spoon for the extra sauce! I enjoy making it ahead and just warming it up—easy peasy!
Key Ingredients & Substitutions
Pasta: I love rigatoni for its ability to hold the creamy sauce well. If you can’t find it, penne works too! You could also try whole wheat or gluten-free pasta for dietary needs. Just adjust cooking time as needed.
Pumpkin Puree: Canned pumpkin is super convenient. If you’re feeling adventurous, you can roast and puree fresh pumpkin for a fresher flavor. Just make sure to remove excess water if using fresh!
Ricotta Cheese: Creamy ricotta is key here. If you want a lighter option, cottage cheese can be blended until smooth as a substitute. Or, for a richer flavor, mascarpone is a great alternative!
Cheeses: I use mozzarella for its meltiness and Parmesan for the flavor. If you’re dairy-free, vegan cheese or nutritional yeast might be good substitutes. Just check the packaging for melting properties.
Seasonings: Garlic powder, sage, and nutmeg give this dish its seasonal charm. Feel free to get creative! Rosemary or thyme can also add a nice twist. Fresh herbs really enhance the flavor.
How Do I Get the Cheese to Melt Perfectly?
Getting that cheesy top just right is easy! Here are my steps for the perfect cheesy finish:
- Use shredded cheese, as it melts better than whole slices. Make sure to sprinkle it evenly on top.
- Watch the bake time; you want it bubbly and golden. If it’s getting too brown, cover it loosely with foil.
- Let it rest for 5 minutes after baking. This helps the cheese set slightly, making it easier to scoop!
By following these tips, you’ll achieve that delicious, gooey cheese topping that everyone will love.
Cheesy Pumpkin Ricotta Pasta Bake
Ingredients You’ll Need:
- 12 oz rigatoni or penne pasta
- 1 ½ cups pumpkin puree (canned or fresh)
- 1 ½ cups ricotta cheese
- 1 cup shredded mozzarella cheese, divided
- ½ cup grated Parmesan cheese
- 1 large egg
- 1 tsp garlic powder
- ½ tsp dried sage
- ½ tsp nutmeg (freshly grated if possible)
- Salt and freshly ground black pepper, to taste
- 1 tbsp olive oil or butter (for greasing the dish)
- Fresh parsley or basil, chopped (for garnish)
Time Needed:
This recipe will take about 10 minutes to prepare, plus 25-30 minutes to bake. In total, you’re looking at roughly 40 minutes for a delicious, cheesy dinner that everyone will enjoy!
Step-by-Step Instructions:
1. Preheat the Oven:
First, preheat your oven to 375°F (190°C). Grease a medium baking dish with olive oil or butter so your pasta bake doesn’t stick.
2. Cook the Pasta:
Bring a large pot of salted water to a boil. Add the rigatoni or penne and cook according to the package directions until it’s al dente. This usually takes about 8-10 minutes. Once cooked, drain the pasta and set it aside while you prepare the other ingredients.
3. Make the Pumpkin Filling:
In a large mixing bowl, combine the pumpkin puree, ricotta cheese, ½ cup of the shredded mozzarella, grated Parmesan, egg, garlic powder, dried sage, nutmeg, and a pinch of salt and pepper. Mix everything together until smooth and creamy. This filling is key to the dish—so make sure it’s well combined!
4. Combine with Pasta:
Now, add the drained pasta to the pumpkin-ricotta mixture. Gently fold the pasta into the mixture until all the noodles are nicely coated. You want to make sure every piece of pasta gets that delicious pumpkin goodness!
5. Transfer to Baking Dish:
Pour the pasta mixture into the greased baking dish. Spread it out evenly to ensure it cooks nicely. You know you’re doing it right when it looks all creamy and inviting!
6. Add More Cheese!
Sprinkle the remaining ½ cup of shredded mozzarella cheese over the top. This will create a wonderfully gooey, cheesy crust as it bakes.
7. Bake to Perfection:
Place your baking dish in the preheated oven and let it bake for about 25-30 minutes. You’re looking for it to be bubbly and golden brown on top. The cheese will melt nicely, forming a delicious top layer!
8. Let It Rest:
Once out of the oven, allow the pasta bake to cool for about 5 minutes. This waiting time helps everything firm up a bit before slicing and serving.
9. Serve and Enjoy:
Garnish your Cheesy Pumpkin Ricotta Pasta Bake with freshly chopped parsley or basil. Serve it warm, and for a delightful meal, pair it with a simple side salad or some warm garlic bread.
This comforting dish is a delightful fusion of flavors, perfect for any autumn or cozy dinner moment. Enjoy your delicious creation!
img src=”https://creativedinnerideas.com/wp-content/uploads/2025/09/cheesy-pumpkin-ricotta-pasta-bake.webp” alt=””>
Can I Use Fresh Pumpkin Instead of Canned?
Absolutely! If you want to use fresh pumpkin, roast it until tender, then scoop out the flesh and blend it until smooth. Just make sure to drain any excess moisture before adding it to your mixture for the right consistency!
How Do I Store Leftovers?
Store any leftovers in an airtight container in the fridge for up to 3 days. When reheating, do so gently in the oven at 350°F (175°C) or in the microwave, adding a splash of water or broth to keep it moist.
Can I Make This Dish Ahead of Time?
Yes, you can prepare the pasta bake up to the baking step and refrigerate it for up to 24 hours. Just cover it with plastic wrap or foil. When you’re ready to bake, remove it from the fridge and add a few extra minutes to the baking time if needed.
Can I Use Different Cheeses?
Definitely! Feel free to switch up the cheeses to suit your taste. You could use a blend of cheddar for a sharper flavor or gouda for a smoky twist. Just ensure that whatever cheese you choose melts well for the best texture!