This Creamy Pepperoncini Chicken Skillet is a flavorful one-pan dish that brings juicy chicken and zesty pepperoncini peppers together in a creamy sauce. It’s perfect for a quick dinner!
You’ll love how easy this recipe is! I just sauté the chicken, add some peppers, and let it simmer. Serve it over rice or noodles for a meal that can make any day feel special. Yum!
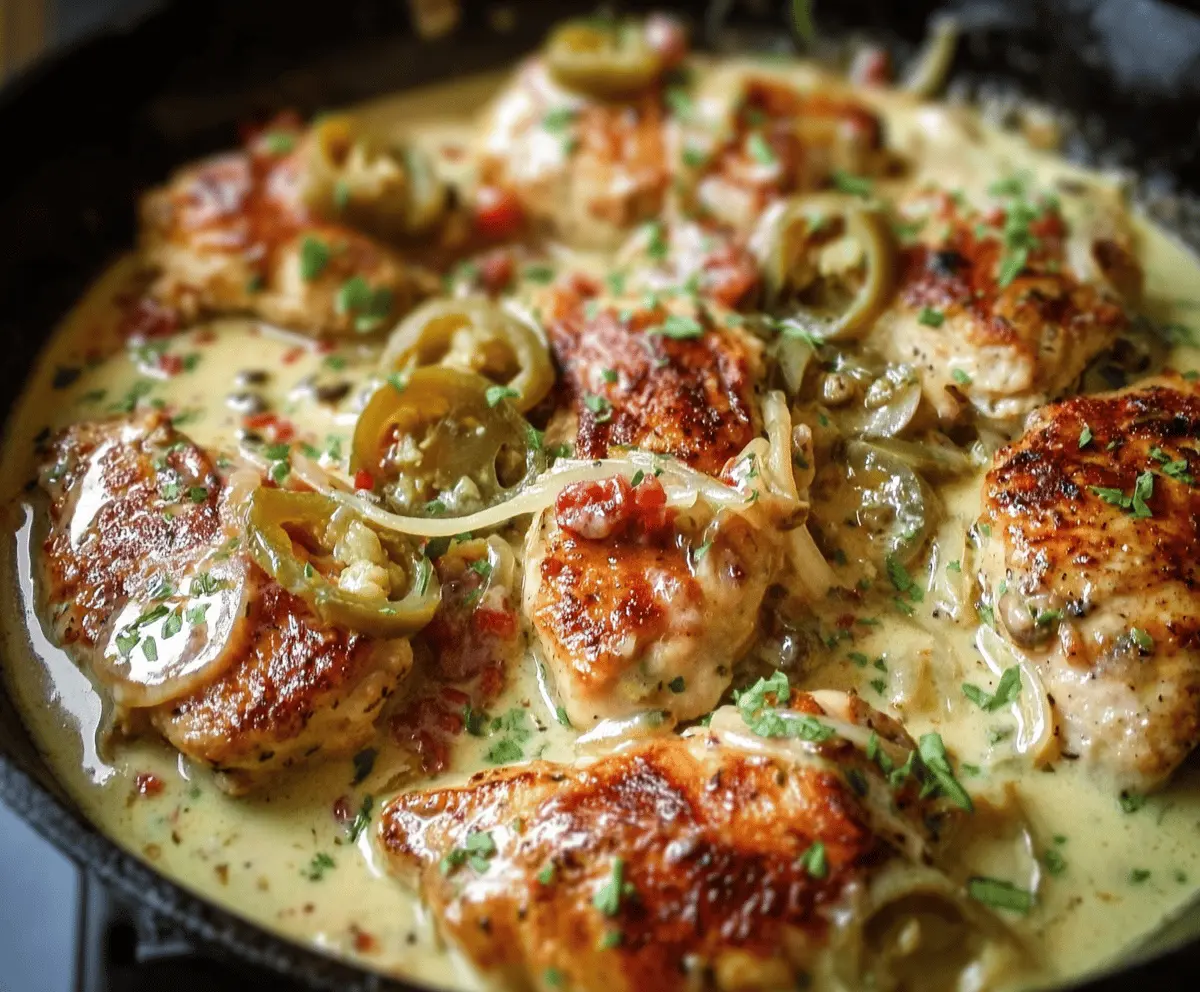
Key Ingredients & Substitutions
Chicken: I prefer using boneless thighs for extra juiciness, but chicken breasts also work well. If you’re looking for a lighter option, consider using turkey cutlets instead!
Olive Oil: Olive oil adds great flavor, but you can use any vegetable oil if you run out. Avocado oil is a good alternative as it has a high smoke point.
Pepperoncini Peppers and Juice: These give the dish its zing. If pepperoncini aren’t available, you can use pickled jalapeños or banana peppers for a similar taste, but they may add more heat.
Heavy Cream: For a lighter version, substitute with half-and-half or full-fat coconut milk for a dairy-free option. I’ve tried all these, and they still create a creamy texture!
Parmesan Cheese: While Parmesan is my go-to, you can swap it with Pecorino Romano or nutritional yeast for a dairy-free alternative. It still gives that cheesy flavor!
How Do I Perfectly Sauté Chicken for This Recipe?
Cooking the chicken perfectly is key to this dish. Here are some tips to get that golden color and juicy texture:
- Make sure the chicken is at room temperature before cooking. This helps in even cooking.
- Heat your skillet to medium-high before adding oil. This ensures a nice sear when cooking!
- Don’t overcrowd the pan. Cook in batches if necessary to keep the temperature steady.
- Let the chicken cook undisturbed for 4-5 minutes per side. Flip it only once for that perfect crust!
- Once added back to the sauce, let it simmer covered to keep it juicy.
With these tips, you’ll have perfectly cooked chicken every time!

How to Make Creamy Pepperoncini Chicken Skillet
Ingredients You’ll Need:
For the Chicken:
- 6 boneless, skinless chicken thighs or breasts
- 2 tablespoons olive oil
- Salt and black pepper, to taste
- 1 teaspoon garlic powder
- 1 teaspoon dried oregano
- 1/2 teaspoon smoked paprika (optional)
For the Sauce:
- 1 small onion, thinly sliced
- 1/4 cup pepperoncini juice (from the jar)
- 1/3 cup pepperoncini peppers, sliced
- 1/2 cup diced tomatoes (optional)
- 1 cup heavy cream
- 1/2 cup chicken broth
- 1/2 cup grated Parmesan cheese
For Garnish:
- Fresh parsley, chopped
How Much Time Will You Need?
This delicious Creamy Pepperoncini Chicken Skillet takes about 30 minutes in total: 10 minutes for prep and about 20 minutes for cooking. It’s a simple and quick meal perfect for busy weeknights!
Step-by-Step Instructions:
1. Season the Chicken:
Start by patting the chicken dry with paper towels. This helps to achieve a nice golden crust. Season both sides generously with salt, black pepper, garlic powder, dried oregano, and smoked paprika for that lovely depth of flavor.
2. Sear the Chicken:
In a large skillet, heat the olive oil over medium-high heat. Once it’s hot, add the seasoned chicken. Cook for about 4-5 minutes on each side until the chicken is golden brown. Remove the chicken from the skillet and set it aside on a plate.
3. Sauté the Onions:
In the same skillet, add your sliced onion. Sauté it for about 3-4 minutes until the onion becomes soft and translucent, soaking up all those tasty bits left from the chicken.
4. Add Pepperoncini and Tomatoes:
Now, add the pepperoncini juice, sliced pepperoncini peppers, and diced tomatoes (if using). Stir everything together and let it simmer for about a minute. This will enhance the flavor and incorporate those delicious peppers.
5. Make it Creamy:
Next, pour in the heavy cream and chicken broth. Give it a good stir, scraping the brown bits from the bottom of the skillet. They bring lots of flavors to the sauce!
6. Add Cheese:
Sprinkle in the grated Parmesan cheese and stir until it melts completely and the sauce becomes rich and creamy. This is the magic touch that makes this dish irresistible!
7. Return the Chicken:
Now, place the chicken back in the skillet. Make sure to spoon some of that creamy sauce over the top. Lower the heat, cover the skillet, and let it simmer gently for 8-10 minutes. This ensures your chicken cooks through perfectly, and all the flavors meld together.
8. Garnish and Serve:
Once the chicken is fully cooked, sprinkle chopped fresh parsley over the top for a pop of color and freshness. Serve it hot, and don’t forget to spoon that creamy sauce over rice, noodles, or mashed potatoes. Enjoy your delightful meal!
img src=”https://creativedinnerideas.com/wp-content/uploads/2025/09/creamy-pepperoncini-chicken-skillet.webp” alt=””>
Can I Use Frozen Chicken for This Recipe?
Yes, you can use frozen chicken, but it’s essential to thaw it completely first. Thaw chicken overnight in the refrigerator or use the cold water method by sealing it in a plastic bag and submerging it in cold water. Pat it dry before seasoning to avoid a watery sauce.
How Do I Store Leftovers?
Leftovers can be stored in an airtight container in the refrigerator for up to 3 days. Reheat gently in the microwave or on the stovetop over low heat, adding a splash of cream or broth to ensure the sauce stays creamy.
Can I Make This Dish Dairy-Free?
Absolutely! You can substitute heavy cream with full-fat coconut milk or a dairy-free cream alternative. For the cheese, nutritional yeast provides a cheesy flavor without dairy!
What Should I Serve with This Chicken?
This dish pairs beautifully with rice, pasta, or mashed potatoes to soak up the creamy sauce. You can also serve it with a simple green salad or steamed vegetables for a complete meal!