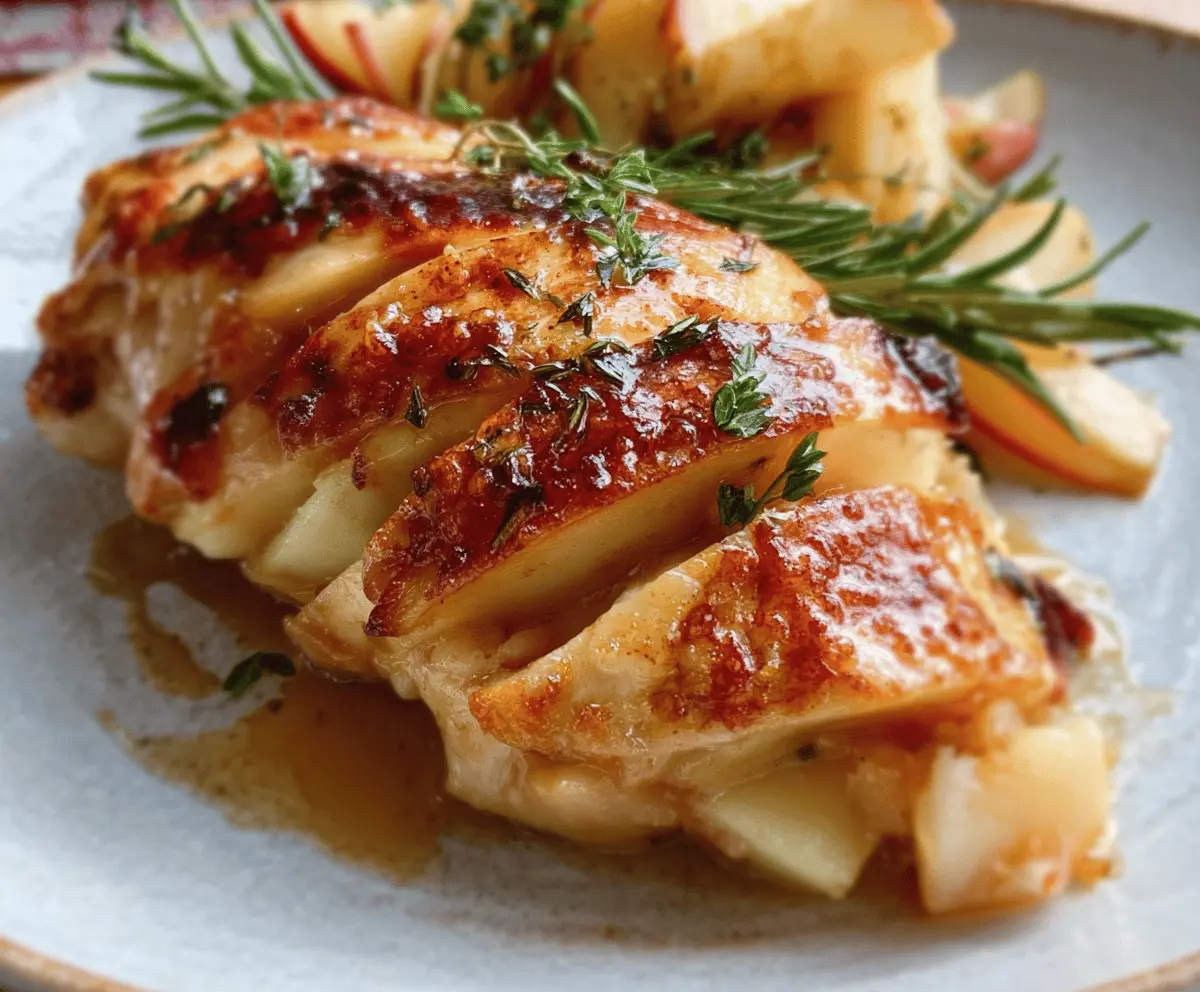
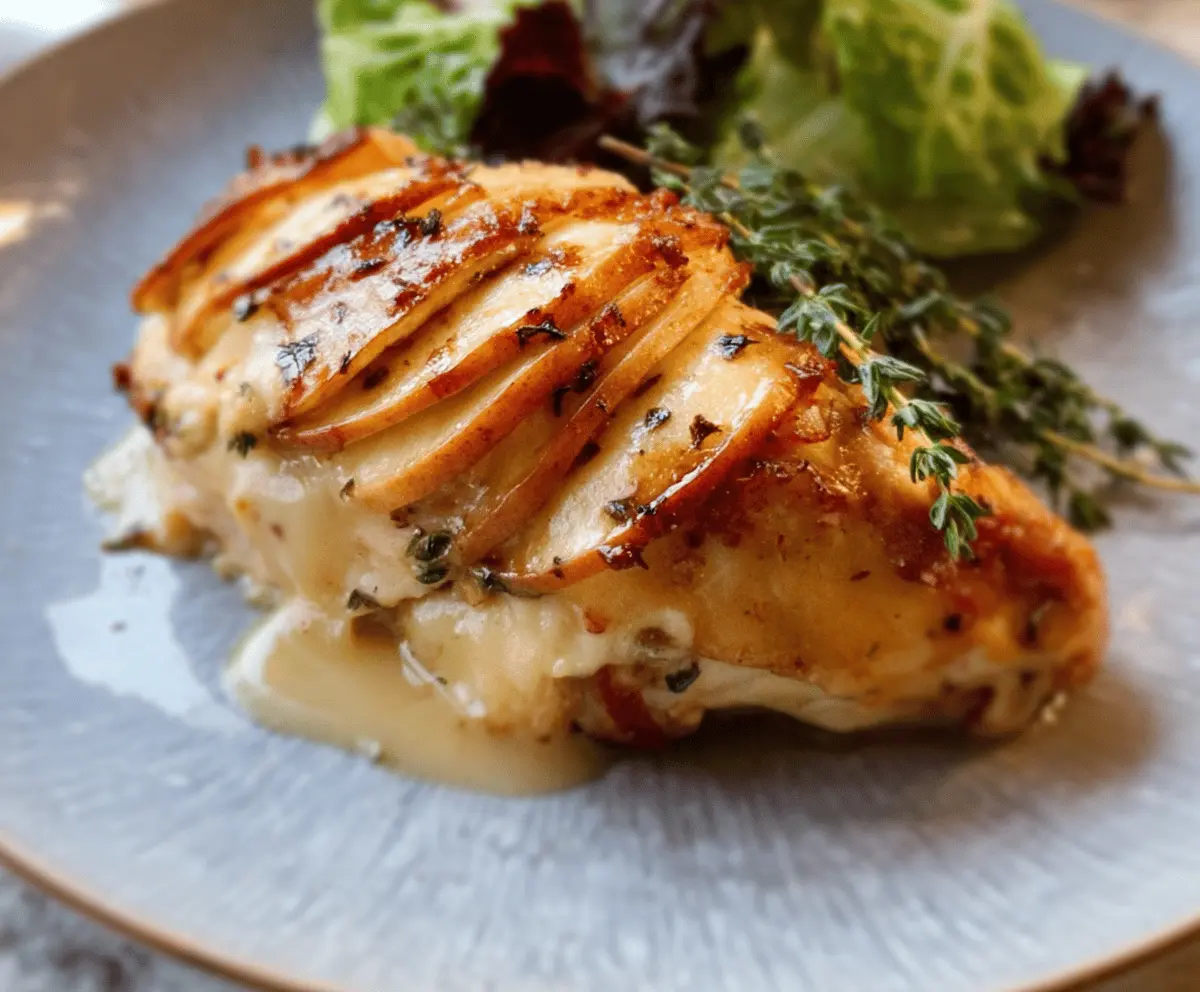
This chicken recipe is a delicious twist with juicy chicken, creamy brie cheese, and sweet apple slices topped with a maple glaze. It’s a flavor combo that makes you feel cozy!
I love how the warm brie melts in my mouth, and the maple adds a touch of sweetness. It feels fancy but is easy enough for a weeknight dinner. Perfect for impressing friends! 🍏🧀
Key Ingredients & Substitutions
Chicken Breasts: Boneless, skinless chicken breasts are best for this recipe because they cook evenly and are easy to stuff. If you prefer, you can use chicken thighs for a richer flavor; just adjust the cooking time as they may take longer to cook.
Brie Cheese: The creamy, buttery flavor of brie is perfect here. If you need a substitute, try Camembert or even a mild cream cheese for a similar texture. Just note that the flavor will differ slightly, but it’ll still be tasty!
Apples: Gala and Honeycrisp work great for their sweetness and crisp texture. If you prefer a tarter flavor, Granny Smith apples are a good option. You might also use pear slices for a fun twist!
Maple Syrup: Pure maple syrup gives a lovely sweetness. If you’re looking for a sugar-free alternative, try using agave nectar or honey, remembering that honey has a stronger flavor.
How Do I Cut Chicken Breasts for Stuffing?
Cutting a pocket in chicken breasts can seem tricky, but it’s easy with some care! Here’s how:
- Use a sharp knife for smooth cuts. Start by placing the chicken breast on a cutting board.
- Insert the knife into the thickest part and slice horizontally, creating a pocket. Aim to create an opening but don’t cut all the way through.
- Gently pull apart the cut while sliding the knife to ensure you have enough space for stuffing.
Practice makes perfect, and with a little patience, you’ll get the hang of it quickly!
What’s the Best Way to Sear Chicken?
Searing chicken helps develop a great crust, which locks in juices. Here’s a simple method:
- Heat some olive oil in an oven-safe skillet over medium-high heat until it shimmers. This indicates it’s hot enough to sear.
- Carefully place the stuffed chicken breasts in the skillet, ensuring they don’t touch to prevent steaming.
- Cook for 3-4 minutes until golden brown, then flip carefully and sear the other side.
Don’t rush this step! Searing adds flavor, and you’ll love the golden color it brings to the dish.
Maple Glazed Apple and Brie Stuffed Chicken
Ingredients You’ll Need:
- 4 boneless, skinless chicken breasts
- 4 oz brie cheese, sliced
- 1 large apple (such as Gala or Honeycrisp), thinly sliced
- 2 tablespoons olive oil
- 3 tablespoons pure maple syrup
- 1 teaspoon fresh thyme leaves (plus extra sprigs for garnish)
- 1/2 teaspoon garlic powder
- Salt and freshly ground black pepper, to taste
- Toothpicks or kitchen twine (to secure the stuffed chicken)
How Much Time Will You Need?
This delightful dish takes about 15 minutes to prep and about 25 minutes to cook, making it a 40-minute total for a hearty, flavorful meal. You’ll have juicy, stuffed chicken ready to impress in no time!
Step-by-Step Instructions:
1. Preheat the Oven:
Start by preheating your oven to 375°F (190°C). This ensures your chicken cooks evenly and comes out perfectly juicy.
2. Prepare the Chicken:
Carefully use a sharp knife to cut a pocket in each chicken breast. Slice horizontally through the thickest part, being sure not to cut all the way through. This will create a space for the delicious filling!
3. Season the Chicken:
Sprinkle salt, pepper, and garlic powder inside and outside each chicken breast to add flavor. Don’t be shy—seasoning is key to a tasty dish!
4. Stuff the Chicken:
Now, it’s time to stuff! Place a few slices of brie cheese and a few apple slices into each chicken pocket. Once filled, secure the openings with toothpicks or some kitchen twine to keep all that delicious goodness inside.
5. Sear the Chicken:
In an oven-safe skillet, heat up the olive oil over medium-high heat. Carefully place the stuffed chicken breasts into the skillet and sear for about 3-4 minutes on each side until they turn a lovely golden brown. This step locks in the flavors.
6. Add the Toppings:
Once seared, remove the skillet from the heat. Lay some additional thin apple slices on top of each chicken breast for extra flavor and a pretty presentation.
7. Drizzle with Maple Syrup:
Generously drizzle maple syrup over the chicken and apple slices. Don’t forget to sprinkle fresh thyme leaves on top for that aromatic touch.
8. Bake the Chicken:
Now, pop your skillet into the preheated oven and bake for 20-25 minutes. You want the chicken to reach an internal temperature of 165°F (74°C) to ensure it’s perfectly cooked.
9. Finish Up:
Once baked, carefully remove any toothpicks or twine from the chicken. Garnish with extra sprigs of fresh thyme for a beautiful presentation.
10. Serve & Enjoy:
Serve your maple glazed apple and brie stuffed chicken hot alongside fresh greens or your favorite vegetables. Now, dig in and enjoy the delightful melty, sweet, and savory flavors!
This dish features juicy chicken breasts enveloping creamy, melted brie cheese and tender apple slices, all glazed with a sweet and herbaceous maple finish. Happy cooking!
Can I Use Frozen Chicken Breasts for This Recipe?
Yes, you can use frozen chicken breasts, but make sure they are completely thawed before preparing the dish. The best way to thaw is to place them in the refrigerator overnight or you can thaw them quickly by submerging them in a sealed plastic bag in cold water for about an hour.
What If I Can’t Find Brie Cheese?
If you can’t find brie, you can substitute it with Camembert cheese for a similar creamy texture. Soft cream cheese is also a great alternative, though the flavor will be a bit milder. Just ensure it can melt for that delicious gooeyness!
How Can I Store Leftovers?
Store any leftovers in an airtight container in the refrigerator for up to 3 days. To reheat, place the chicken in the oven at 350°F (175°C) until warmed through, which helps retain its moisture.
Can I Prep This Dish Ahead of Time?
Absolutely! You can prepare the chicken up to the stuffing step in advance. Just cover and refrigerate it until you’re ready to sear and bake. This makes weeknight cooking a breeze!