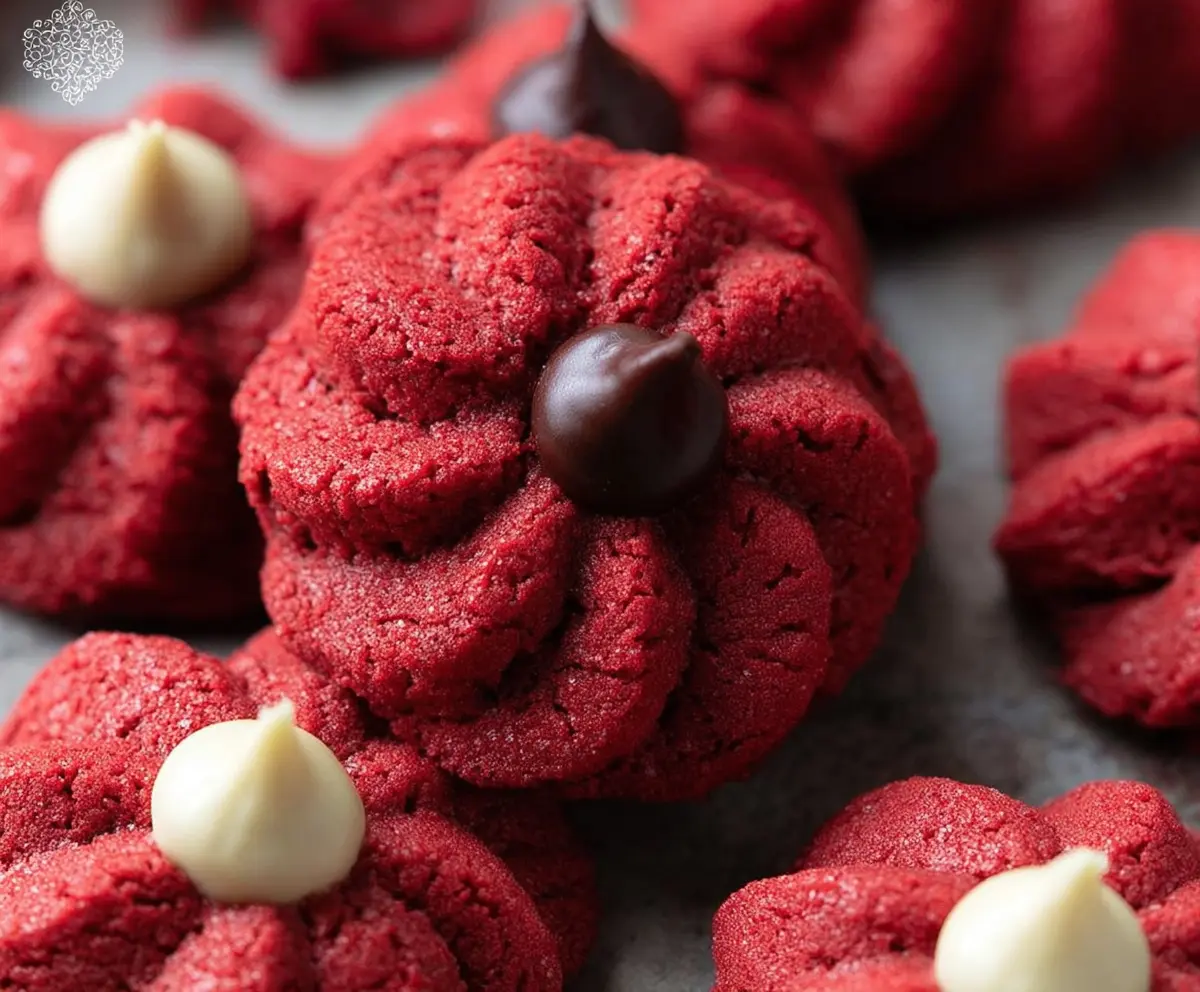
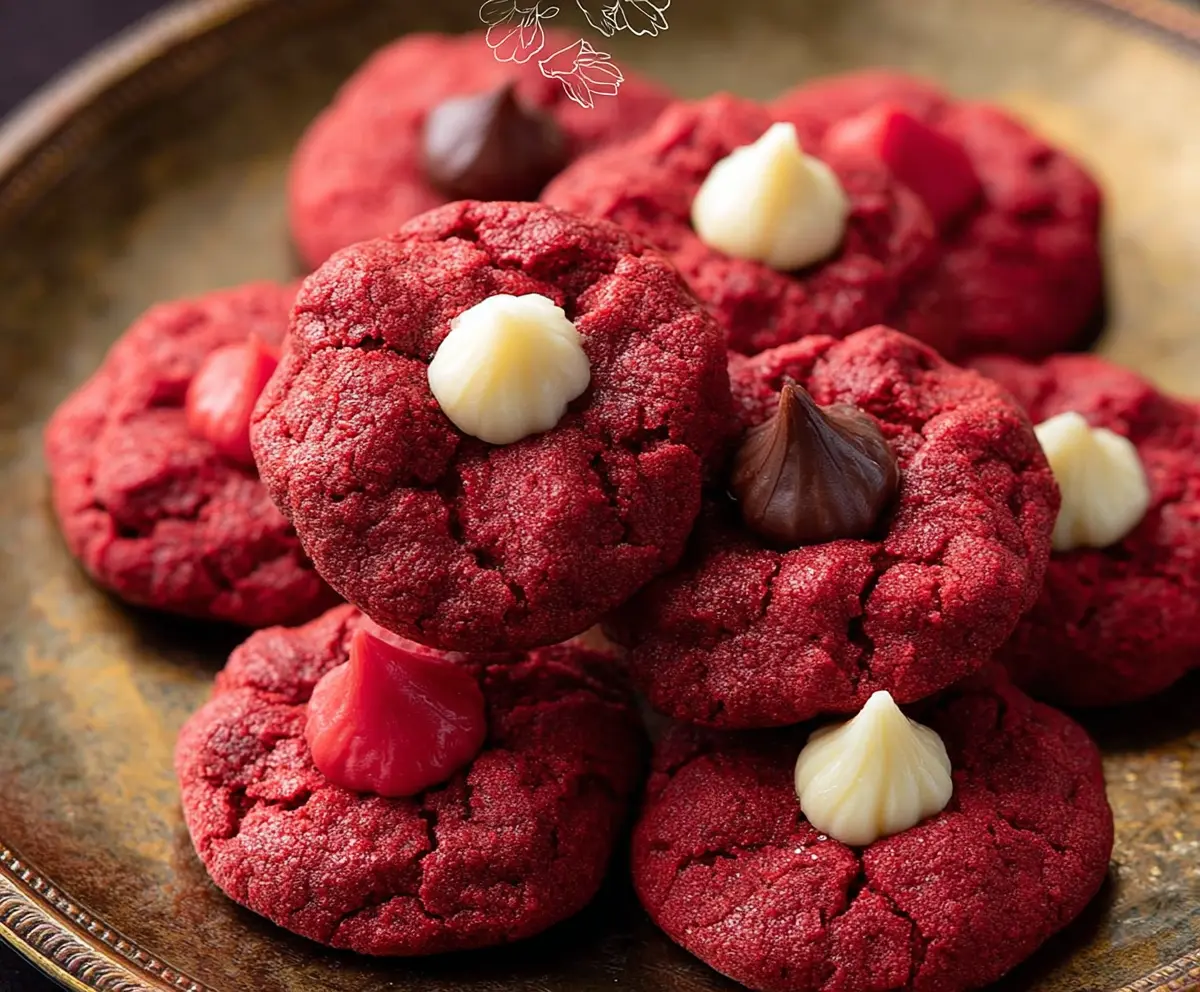
These Red Velvet Blossom Cookies are a fun twist on the classic cookie! They’re soft, sweet, and dressed up with a delicious chocolate kiss right on top.
If you’re like me, you might be tempted to eat the whole batch in one sitting—who can resist that pretty red color? Just bake, cool, and enjoy these treats with a friend (or not!).
Key Ingredients & Substitutions
Unsalted Butter: This is a key player for texture. If you’re out of butter, you can substitute with margarine or a vegan butter alternative. Just make sure it’s softened for easy mixing!
Granulated Sugar & Powdered Sugar: Both sugars contribute to the cookies’ sweetness. For a healthier option, you might try coconut sugar or a sugar substitute, though it may slightly change the texture.
Red Food Coloring: Gel food coloring gives a vibrant color without too much liquid. If you want to go all-natural, beet juice works, but it might not give as vibrant of a red.
Cocoa Powder: It adds depth to the flavor. You could leave it out if you want a more classic red velvet flavor, or use Dutch-processed cocoa for a smoother taste.
Chocolate Kisses: These are a must for topping! For a fun twist, try peanut butter cups or white chocolate kisses for a different flavor profile.
How Do I Achieve the Perfect Cookie Texture?
Getting the right texture is crucial for these cookies. You want them soft and chewy. Here are the key steps:
- Make sure your butter is soft, but not melted. It should leave an indentation when pressed lightly.
- Don’t overmix after you add the dry ingredients. Mixing just until combined helps keep them tender.
- Keep an eye on the baking time! The cookies should look set but soft. They’ll continue to firm up as they cool.
Lastly, pressing the chocolate right in after baking helps create that gooey center. Enjoy making your cookies perfect every time!
Red Velvet Blossom Cookies
Ingredients You’ll Need:
- 1/2 cup (1 stick) unsalted butter, softened
- 1/4 cup granulated sugar
- 1/2 cup powdered sugar
- 1 large egg
- 1 teaspoon vanilla extract
- 1 tablespoon red food coloring
- 1 1/4 cups all-purpose flour
- 1 tablespoon cocoa powder
- 1/2 teaspoon baking soda
- 1/4 teaspoon salt
- Chocolate kisses (milk or dark chocolate), for topping
- White chocolate chips or white chocolate kisses, for topping (optional)
How Much Time Will You Need?
This recipe will take about 15 minutes for preparation and 10 minutes for baking, plus a few minutes for cooling. So, overall, you’ll spend about 30 minutes getting these delicious cookies ready to serve!
Step-by-Step Instructions:
1. Preheat Your Oven:
Begin by preheating your oven to 350°F (175°C). While that’s warming up, take a moment to line a baking sheet with parchment paper or a silicone baking mat. This will help your cookies bake evenly and prevent sticking!
2. Cream the Butters and Sugars:
In a large mixing bowl, combine the softened butter, granulated sugar, and powdered sugar. Using a mixer, cream these together until the mixture is light and fluffy. This process normally takes about 2-3 minutes.
3. Add Egg, Vanilla, and Food Coloring:
Once your butter and sugars are ready, add in the egg, vanilla extract, and red food coloring. Beat the mixture until all the ingredients are well combined and you have a vibrant red batter.
4. Mix Dry Ingredients:
In a separate bowl, sift together the all-purpose flour, cocoa powder, baking soda, and salt. This helps to ensure that your cookies will be light and fluffy without lumps.
5. Combine Wet and Dry Ingredients:
Gradually add the dry ingredient mixture to the wet ingredients. Stir gently until everything is just combined to form a soft dough. Be careful not to overmix; we want the cookies to stay tender!
6. Shape the Cookies:
Using a tablespoon, scoop out the dough and roll it into balls. You should get about 24 balls. Place these on your prepared baking sheet, spacing them about 2 inches apart to allow for spreading as they bake.
7. Bake the Cookies:
Please pop the baking sheet into the preheated oven and bake for 8 to 10 minutes. The cookies should be set around the edges but still a little soft in the center. Remember, they will continue to cook a little after removing them from the oven!
8. Add the Toppings:
As soon as you take the cookies out, press a chocolate kiss or a white chocolate chip into the center of each cookie. This not only looks fancy but adds a delightful chocolatey surprise.
9. Cool and Serve:
Let the cookies cool on the baking sheet for about 5 minutes so they can firm up a bit. Then, carefully transfer them to a wire rack to cool completely. Enjoy your delightful Red Velvet Blossom Cookies with a chocolate center!
These cookies are perfect for any celebration or simply as a sweet treat any day of the week! Enjoy your baking adventure!
Can I Use a Different Type of Sweetener?
Absolutely! You can substitute granulated sugar with coconut sugar for a healthier option. Keep in mind that this may slightly alter the color and texture of the cookies.
What If I Don’t Have Red Food Coloring?
If you’re out of red food coloring, you can use beet juice for a natural alternative, though it might not achieve the same bright hue. Another option is to simply omit it, making the cookies a subtle chocolate flavor instead!
How Should I Store Leftover Cookies?
Store any leftover cookies in an airtight container at room temperature for up to 3 days. For longer storage, you can freeze them! Just wrap each cookie individually or store in a freezer-safe container, and they’ll last for up to 2 months.
Can I Make These Cookies Ahead of Time?
Yes, you can prepare the dough ahead of time! Roll it into balls and refrigerate for up to 2 days or freeze for longer storage. Bake them straight from the fridge or freezer, adding an extra minute or two to the baking time as needed.